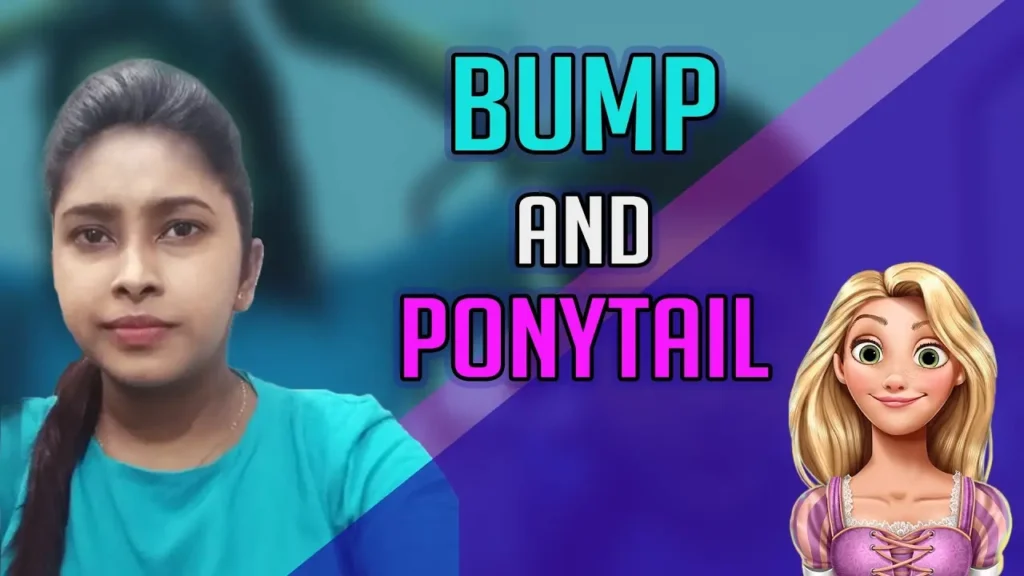
How to do a bumped ponytail without teasing step-by-step
I’ve been getting a lot of questions about how to do a bumped ponytail without teasing lately. The trick is not to tease the hair like you would for regular hair.
My goal is to help anyone who wants a ponytail bump look but haven’t figured out how to achieve it. I’m going to share my step-by-step tutorials with you so that you can do it right the first time.
Let’s get straight into this tutorial so i can show you how i do it, both with it bumped at the top and at the front.
Tools and materials you’ll need:
- Brush
- Hair elastic
- Clip
- Ponytail bump tool
How to do a bump ponytail hairstyle without teasing it in 8 easy steps
The bump ponytail is a great go-to hairstyle for many reasons. It’s simple and easy to do, it’s perfect for any occasion, and it doesn’t require much product.
In this section of the article, we’ll show you how to do a bump ponytail without teasing in 8 easy steps:
1. Brush your hair
Gently brush your hair towards the nape of the neck and make sure you don’t get all the way down to the roots, as you want to keep most of the volume on top.
Tip: This is a hairstyle that suits people of all hair types and lifestyles. The desired effect can be easily achieved by not washing hair for two days and styling it with your preferred products.
2. Gather and tie your hair
Next, gather your hair in a loose ponytail and brush it out. Trailing strands can make it look messy or as if it’s not put together.
So brush from the ends up to the roots; this will create more volume in the area of your hair tie, making for a neater appearance. Next bring your ponytail to about the middle of your back and
3. Tighten the ponytail
As you raise your hair up, start tightening.
4. Pull your top hair
To achieve a perfect ponytail, start by gathering hair at the top of your head. Secure in place with an elastic band. When you pull your hair back at the top, be sure to hold the ponytail in place so as not to over-pull.
Next, take your ponytail and pull it up tightly. This is just like the tugging you did in step 3.
Now, repeat the process; Gather your hair on top of your head and then pull it into a ponytail.
Tip: It can take a few tries to get the tutorial right and it may not hold afterward. Don’t worry, just keep going!
5. Tease your hair (optional)
If you need more volume & hold, try teasing the hair at the top. And yes, if you watch my video on how to bump a ponytail tutorial — or even ask most anyone else with long hair — they’ll tell you that this process does not always work as expected. You would often have to repeat a few steps to get it right
You can see how this bump is raised up on my head and that it’s better than at the first try. I really want it to be a perfect ponytail bump!
6. Loosen the front strands
For perfection, take out a few strands of hair from the front of your head so that they fall onto the face- this will create a perfect frame especially if you want a ponytail with bangs.
7. Smoothen the bump
Use the brush to smooth out the bump with gentle strokes.
You can also tuck some of the side strands of your hair behind your ears to create a messy and fun look.
8. Bonus tip: Use a clip
Here is a quick little trick and a fun twist that the classic ‘bump ponytail’: if you want your hair to stand up, just pin it back with a ponytail bump tool.
It’s important to find a ponytail bump tool that’ll work with the amount of hair you have. Make sure it has an opening that will match your hairdo correctly.
For instance, I have fine hair and it would make sense for me to buy a ponytail bump tool with a small gap. If you have thicker hair, then an intermediary gap would suffice.
So now, simply put your hair up in a ponytail and clip it to secure.
How to do a ponytail with a bump in front?
A ponytail is a hairstyle that involves pulling the hair back from the head to form a long, thick braid or twist at the back of the head. A ponytail can be either high or low on the head.
A bump in front is a hairstyle where hair is pulled up and away from the nape of the neck, then twisted into a bun with strands left out on either side of it. The style is often worn by women who have short hair.
1. Start with your hair down
To create a bumped ponytail in the front, first start with your hair down. Then, put your hair up. Finally, spray the back and pat it dry.
2. Section your hair
Next, take a small portion of the top and spray that until it’s dry.
3. Make the ponytail
Now, pull back one side of your hair from the rest so that it is all on one side. Gently start to pull it back and secure it into a ponytail without disrupting the texture.
4. Secure with rubber bands
Secure your bun with a rubber band. Spray some hairspray onto it and then tighten up the base of your ponytail before pushing it up
5. Use clips
Put a small clip at the top of your ponytail and lightly spray. Now crisp up your ponytail with your fingers to give it a more ‘bumped’ look. Give it a light spritz to finish things off and you’re finished!
How to do a ponytail with bump on top?
A ponytail is a hairstyle where hair is pulled back from the face and secured at the back of a person’s head.
The bump on top is when you twist your hair into a bun and then secure it with bobby pins.
The ponytail with bump on top hairstyle will work best for people who have long hair. If you have short hair, then it might not be as successful.
1. Brush out your hair
Brush/comb your hair to remove any knots and tangles before working on a new hairstyle. This will make it easier for you.
2. Decide where you want your bump to be
There are plenty of ways to a bumped ponytail hairstyle. Some people prefer bumping in the front, while others like it up at the very top of their head. All that really matters is what’s most comfortable to you.
To create a bump at the front of your head, you’ll need to use less hair. While for a gentle bump at the top, you’ll need to use some more hair.
Bumps that are toward the front of the head work well for getting bangs and fringe out of your face.
Bumps on the crown of the head, combined with a few strategically placed clips, can produce great updos. They also look really cool and may take a hairstyle back in time for a retro effect.
3. Separate your bump hair section.
Collect a small section of hair with your fingers or the comb and pull it back to make a small bump. Make sure that the part where you’ve gathered your hair is in the middle of your head.
The secret to a perfect high bun is tucking your hair from the sides of your head into it, not letting it out loose at the top.
To make the bump at the top of your head, gather all your hair together on either side of your head right at the temples and stop gathering when you reach the crown.
4. Create a bump without teasing.
Some people find that their hairstyle stays bumped & secure with the help of teasing, but it is not necessary.
If you don’t want to tease your hair, simply gather it at the back, pinch the bottom to create a bump of hair and secure it down with a bobby pin.
You can use 1 bobby pin on each side of the bump and you’ll still have a decent grip. Alternatively, 2 bobbies pins will give you a good hold, but don’t put them directly in line, cross them over each other instead.
If you have black and curly hair, the key to a bump is to rough it up and tease as needed. Blow-dry your wet hair away from your face, then brush back and mess up the front.
Pinch the base of your “bump” and push it forward. Once it’s secure, you’ll want to use bobby pins to make sure it stays up.
If your hair is short enough, you can fold the ends under before securing with bobby pins. You should use a bit of hairspray to keep your bump in place and tame any pesky flyaways.
Conclusion:
As you can see, I have a bump at the top of my head that gives off an impression similar to that of a pineapples. So that’s it, now you know how to get an easy bumped ponytail!
This blog post will walk you through how to achieve this beautifully styled ponytail bumped hairstyle, perfect for any occasion.
So, is it the perfect ponytail bump? I’m a fan because it’s not overly sleek, but still chic! What about you?



Comments are closed.