


Jamaican chiney bump hairstyle
Since I was a little girl, I’ve always rocked the Jamaican Chiney Bump Hairstyle. They were easy, quick and actually just funky and cool. Now-a-days, you find a lot of taboo talk about them.
Some people think they are childish, others feel it’s totally too afro-centric, others feel it’s so archaic. But then, there are the few of us, who see the beauty in this style.
What is a chiney bump hairstyle
A twisted (or braided) portion of hair wrapped around itself to form a bun is called a Chiney Bump Hairstyle or Bantu knot.
Call it a bantu knot, a protective style, or a 90s look making a hardcore fashion comeback—it’s certainly making waves lately!
I often wear bantu knots as a hairstyle leading up to an even better and curlier fro. Normally that means they’re worn late at night, covered with a scarf, and hidden from everyone except me.
Up until recently I never even thought of wearing my knots out. I would see them on a passing stranger or two, but still, the style didn’t seem like it was one I would wear out and about.
I’ll admit, I feel as though it takes a certain level of confidence to rock a bunch of knots in your hair. But once you do, it really becomes this threshold of style and hair confidence. It was something I had yet to reach… until now.
Truthfully, it’s day four or so, and I am still in love with this look. It’s holding up well, and is so incredibly easy to create and to keep up.
Something I really look for when creating any style as a busy person. Here’s how my sister created this look for me!
Hair products for Jamaican chiney bump hairstyle
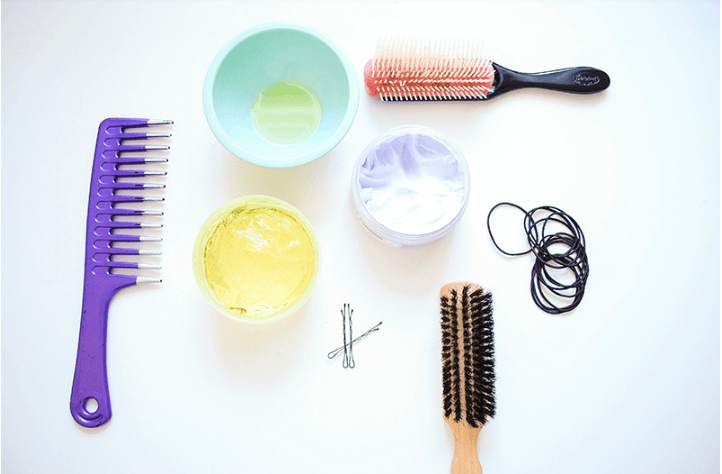
How To do Jamaican chiney bump hairstyle
- –wide tooth comb
- –Denman brush
- –almond and aloe oil
- –Miss Jessie’s Curly Pudding
- –Eco Styler Olive Oil Gel
- –bobby pins
- –hair ties
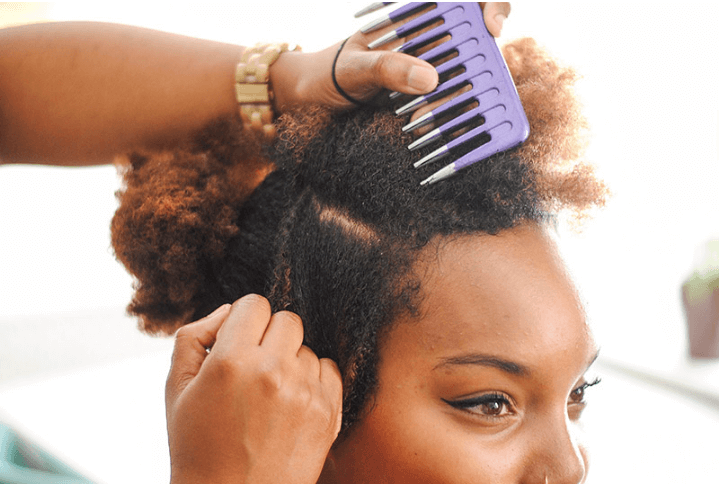
Step one: Wash your hair
After washing or co-washing your hair, separate it into four parts using a t part. Oil and then gently comb through each section with your Denman brush.
After combing each section through and tying it back up, part each section according to the amount of bantu knots you’d like in each one.
My sister created around four knots for each section. Four was great for me because I wanted larger knots, but also because of the thickness of my hair. If you happen to have thinner hair, you would probably like less knots for each section.
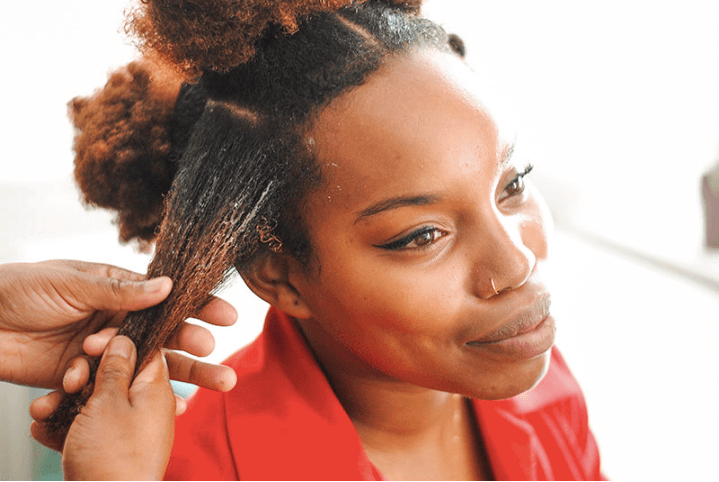
Step two: Praying hands technique
apply all of your products to each section one by one. After applying your products, comb through your smaller hair sections gently and thoroughly.
Step three: Using your hair tie
tightly tie one of your smaller sections creating a ponytail. Then separate that ponytail into two once it’s securely in the hair tie.
Once you have your two pieces of hair in your hands, begin a two strand twist. (Some people create a braid for a different curl pattern. Personally, I prefer a two strand twist. You can choose whatever you like best.)
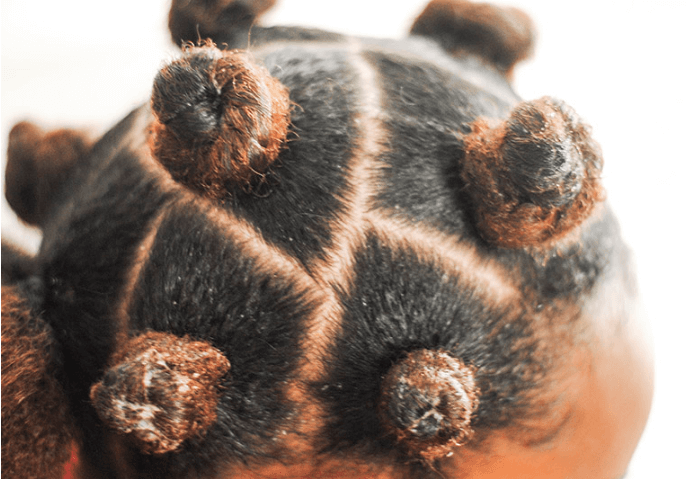
Step four: Twisting the knots
I really do love the way the parts came out as a whole. I love that they look clean, and also kind of weird and cool.
After twisting the two strands together, take the whole twist and twist it in a knot clockwise. To secure your knot, you can use a bobby pin or tuck it under the knot.
Conclusion:
I have to say, despite it’s craziness, this style is one of my favorites! I think what I love most is that it’s actually doing a lot for my hair while it’s in.
As a natural girl, it’s protecting my hair by keeping it twisted and tied during a long period of time. But also, this style can be worn by anybody! Straight hair, fine hair, blonde or brunette you name it!
It also gives most people a great curl once they’ve taken it out. Now that you know how to create this super easy look, will you give it a try?

")
")
")
Comments are closed.