

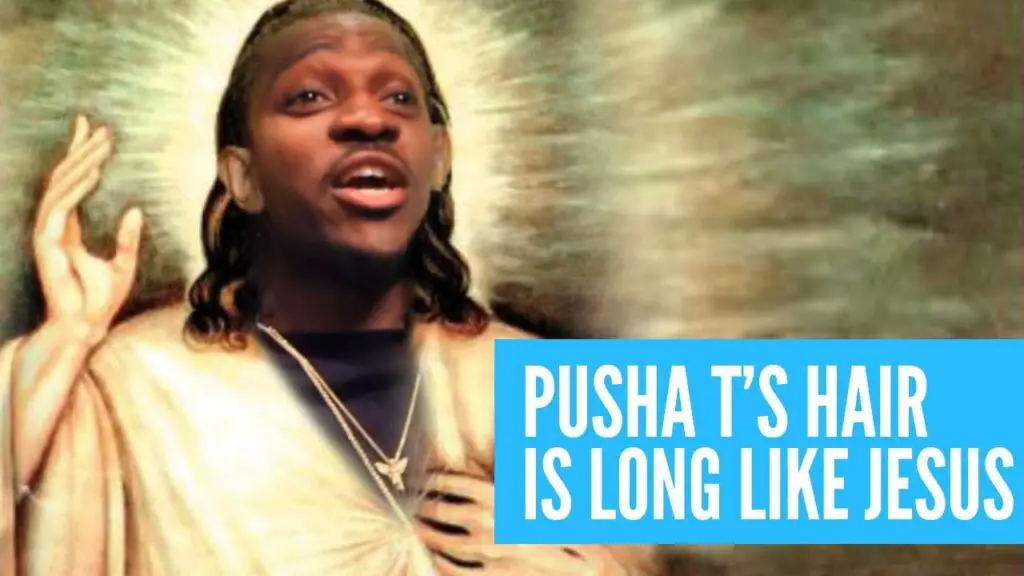
Pusha T braids hairstyle
Pusha T recently addressed some of the comments left on his YouTube video for the 2002 track “Grindin” with Clipse. In addition to explaining how much they paid Pharrell, and how he’ll never age, he also mentioned the story behind his signature Pusha T braids hairstyle.
Last time, Pusha said that he’d just let his hairstyle be “just a Virginia thing,” but this time he’s delved into the story behind it.
Rappers have been rocking braids for a long time. Some of their heroes, like Allen Iverson and Tupac Shakur, chose the style as well.
And now Pusha T chooses to grow his hair out in tribute to them and express how it has personal sentimental value for him. He also talks about how he got braids from a friend after her death.
Pusha T’s trademark braids have been loved and appreciated by the public for a long time now. But the story behind his braids wasn’t revealed until last year.
Pusha T explains his new hairstyle without braids
On Monday, Terrence Thornton, also known as Pusha T, one half of Clipse, and more recently the imperious King Push, cut his signature braids off, and, incidentally, the legs out from beneath every single one of us.
If you know anything about Pusha T, you’d know that he gets a pass for never expanding his horizons beyond rap because he raps about that subject matter better than literally everyone else, he’d rocked braids long (and I do mean long) after everyone else had forsaken them.
He even went so far as to say, “the power’s in my hair” on that high-octane G.O.O.D. Music “Don’t Like” Remix that makes you want to skip the gym and lift cars in the parking lot. Others, like me, were confused and distraught at the news.
How to do Pusha T braids hairstyle?
Braid first, experiment later. Learning how to braid your hair can be hard at first, but with a little practice braiding won’t be a problem. The Pusha T braids hairstyle is the simplest of braids and should have you getting more complex designs in no time!
Male box braids typically involve adding hair from a specific section of the head, using a small snip at the center of the head, and slowly braiding that section in.
- Use a towel to remove excess water from damp hair. Create sections of your hair that you want to braid towards the back of your head.
- Section the front of your hair so that it needs to be divided into three separate strands.
- Begin by plaiting the hair by passing the right strand over the middle strand, then the left strand over the new center strand. Do so twice, and finally tie off each plait with a small piece of hair from its own strand to form a knot.
- Gather a new strand of hair from slightly further towards the back of your head. Add that hair to the left strand. Then pass the entire left strand over the center one and keep going like you did before, then add a right strand of hair over that.
- Reverse the braid by starting with the new strands on the left and adding them to the right. Continue braiding, alternating adding new strands of hair from the left and right of your hair
- Braid until you run out of hair, and fasten with a hair tie.
- Use a bobby pin and some hair product to neaten up any hairs that escape.
Note: if your hair is on the shorter side (4-5 inches), you will need to braid firmly in order to hold the style together.

")
")
")

Comments are closed.